
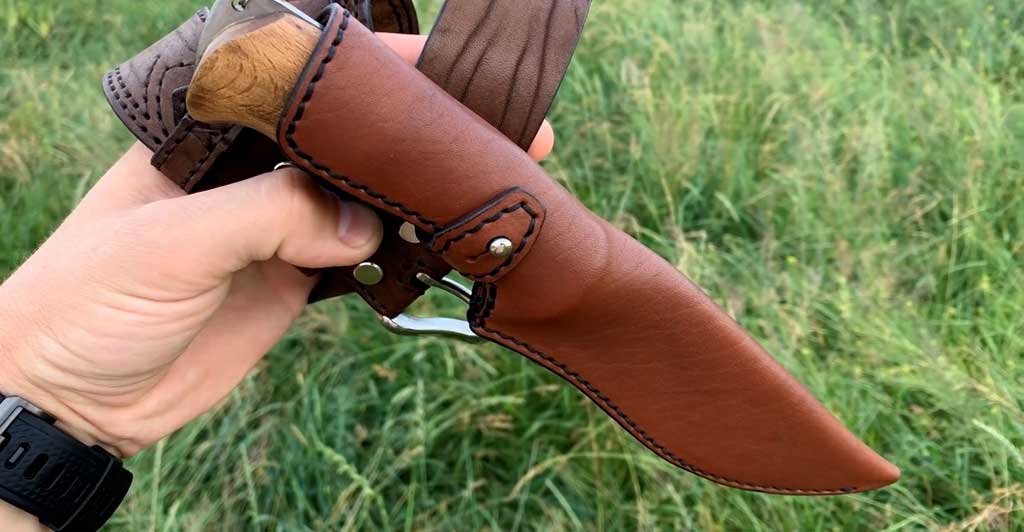
Having a custom leather sheath for your knife not only serves a practical purpose but also adds a touch of personal style and craftsmanship. This detailed guide will provide a step-by-step walkthrough to create a leather knife sheath on your own, focusing on everything from choosing the right leather, and designing the sheath, to the finishing touches.
Required Tools and Materials
Like any craft, working with leather requires a set of specific tools:
- A sharp utility knife or rotary cutter: A must-have for cutting the leather cleanly and precisely.
- A stitching awl: Used for marking and creating holes for stitching.
- A leather punch or pricking iron: For consistent hole placement, which is crucial for neat and sturdy stitches.
- An edge beveler: This tool helps round and smooth the edges of your leather piece, giving it a professional look.
- A bone folder or burnishing tool: Useful for slicking and polishing the edges of the leather, giving your sheath a finished appearance.
- A mallet or hammer: Essential for setting rivets or snaps, securing pieces of leather together without the need for stitching.
Additional materials for sheath assembly
In addition to leather and tools, you’ll need a few more materials to complete your sheath:
- Waxed thread: This type of thread is resistant to water and wear, ideal for stitching leather.
- Leather dye: For adding color and enhancing the natural beauty of the leather.
- Edge finish or burnishing gum: Used for sealing and smoothing the edges of the leather.
- Leather glue or contact cement: Ideal for holding the pieces together before you begin stitching.
- Rivets, snaps, or D-rings: These will be used for attaching straps or belt loops, depending on your sheath design.
Safety equipment recommendations
Leatherwork involves sharp tools and can occasionally be risky. Wearing cut-resistant gloves can protect your hands from accidental cuts, and safety goggles can shield your eyes from any flying debris when grind the edges with an electric tool.
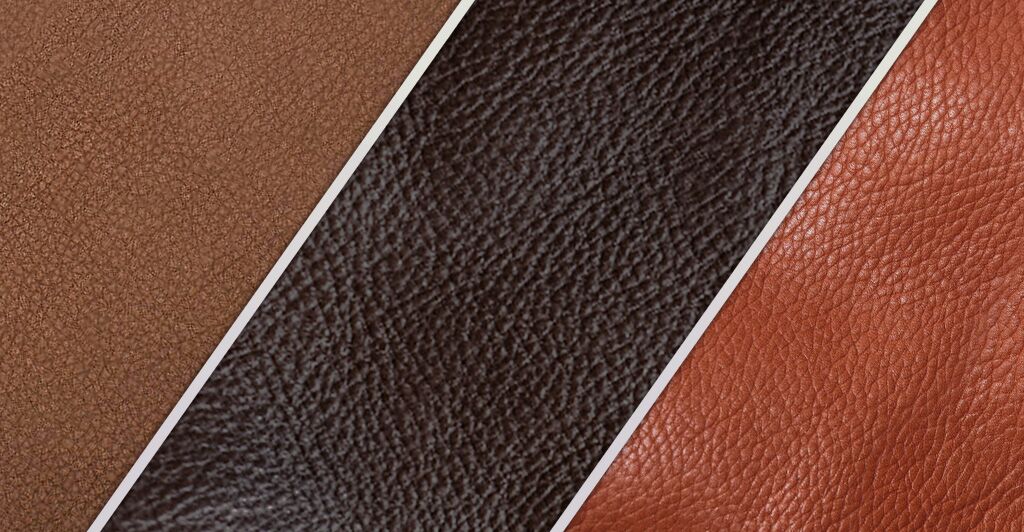
Choosing the Right Leather for Your Knife Sheath
Choosing a leather is not only about “Oh, this one will look nicer!”. It is a crucial first step in crafting a durable knife sheath. Different types of leather have distinct properties that make them suitable for certain uses. Vegetable-tanned leather, processed with organic materials, is popular for knife sheaths due to its sturdiness and ability to maintain its shape well. It also ages gracefully, developing a rich patina over time. Full-grain leather, which incorporates the entire grain of the hide, is another ideal choice. It showcases the natural grain pattern of the hide and provides excellent strength and resistance to wear, making it a luxury choice for your sheath.
The thickness of the leather, usually between 6-9 oz (2-3 mm) for a knife sheath, has a direct impact on its durability and the protection it offers your knife. While thicker leather provides better protection, it’s also more challenging to mold and stitch. If you’re a beginner, starting with a thinner leather may be a more manageable option.
It’s essential to source your leather from a reliable place to ensure that it is of high quality. Local leather shops can offer the opportunity to physically examine the leather before purchasing. However, if this is not an option, numerous online retailers sell a wide range of high quality leather. Look for ones with positive reviews and a good reputation to ensure you’re getting a top-notch product.
Designing Your Leather Knife Sheath
Getting the size right is crucial when designing a sheath. Place your knife on a piece of paper, tracing its shape with a margin of about 1/4 to 1/2 inch (6-12 mm) for stitching and to accommodate the thickness of the leather. This also leaves room for design elements.
Once you have the knife traced, cut out the shape to create a template. Ensure symmetry by folding the template in half – this will make the front and back pieces of the sheath identical. The template will be used to guide you when cutting the leather, ensuring a perfect fit for your knife.

Tips for adding design elements and personal touches
Once you have the basic shape of your sheath, consider adding tooling patterns, embossing, decorative stitching, initials, logos, or other unique touches to personalize your sheath. Remember, the sheath is an extension of your knife, and it’s an opportunity to express your creativity and style.
Cutting and Shaping the Leather
Before cutting your leather, dampen it slightly using a sponge or spray bottle. This process, known as “casing,” softens the leather, making it more pliable and easier to cut and mold.

Place your template on the leather and trace it using a scratch awl or a silver pen, which will show up well on the leather. It’s a good idea to use a cutting mat or a thick piece of cardboard underneath to protect your work surface while you cut along the traced lines with a sharp knife.
In addition to your main pieces, you’ll also need to cut a leather welt. This is a strip of leather that will be placed between the two main pieces of your sheath along the edge where the knife blade will sit. The welt acts as a buffer, not only add an extra layer of protection but also enhance the longevity of your sheath. The welt prevents the sharp blade from cutting the threads when the knife is inserted and removed, maintaining the integrity of your stitches and your sheath overall.
Shaping the leather for a snug fit
To mold the leather to your knife’s shape, slightly wet the leather, wrap it around the knife and secure it with clamps, clothespins, or rubber bands until it dries. This process, called wet molding, will give your sheath a custom fit, providing better protection for your knife.

Stitching the Leather Knife Sheath
The saddle stitch, a hand-sewing technique known for its strength and durability, is recommended for stitching the sheath. To hold the pieces together before stitching, use a leather-specific adhesive such as leather glue or contact cement, which can withstand the rigors of leatherwork. The welt should be prepared by ensuring it fits snugly within the edges of your sheath design where the blade of the knife will sit when sheathed.
Preparing the leather
After gluing the pieces together, including the welt, use a stitching awl, pricking iron, or leather punch to mark and create stitching holes along the leather edges. The holes should pass through both the sheath pieces and the welt. Consistent hole placement is crucial for a neat appearance and a sturdy seam.

Stitching the sheath with the welt
We have already fully covered the topic of how to properly stitch leather, so we won’t go over it again in too much detail. Thread a blunt, curved needle with waxed thread. Start at one end of your sheath, pushing the needle through the first hole, which includes the main pieces of the sheath and the welt, and pulling it through until there’s an equal length of thread on both sides. Then, using the two needles on either end of your thread, go through each hole from both sides. This saddle stitch technique creates a strong, even seam that will hold up to wear and tear and the welt will provide added protection from the blade of your knife.

6. Finishing Touches and Maintenance
After your sheath is stitched and the welt is securely in place, there are a few final touches to make it look professional. Use an edge beveler to remove the sharp corner from the edges, and then apply a leather dye of your choice. After the dye has dried, finish the edges with a burnishing tool or a bone folder to slick them down, and apply edge finish or burnishing gum for a polished look. These finishing touches should include the welt as well, to ensure it’s flush with the rest of the sheath and provides a seamless appearance.

Adding a belt loop or other attachment options
Consider how you want to carry your knife. You can add a belt loop, D-ring, or snap attachment to your sheath for convenient carrying. These can be stitched or riveted onto the back of the sheath, depending on your preference.
Caring for your leather knife sheath to ensure longevity
Leather requires some care to maintain its look and durability. Regularly clean your sheath with a damp cloth and mild soap to remove dirt and grime. Avoid exposing it to excessive heat or moisture, as these can damage the leather. Regularly apply a leather conditioner to keep the sheath supple and prevent it from drying out.
What You’ll Have at the End
Once you’ve completed all these steps and added your unique touches, you’ll end up with more than just a functional leather knife sheath. It will be a handmade, durable, personalized sheath that not only protects your knife but also adds a touch of handcrafted elegance to your toolset. This unique and stylish accessory will be a reflection of your skill, creativity, and dedication. It’ll be something you can be proud of and that will serve you well for years to come.

Benefits of Crafting Your Own Leather Knife Sheath
Creating your own sheath allows you to tailor it to your specific needs and preferences, including the type, color, and thickness of the leather, and adding personal touches. By using high-quality leather and the correct techniques, you can craft a sheath that offers superior protection for your knife and lasts for years. Making your own leather sheath can be more cost-effective than purchasing a ready-made sheath, especially if you already own the necessary tools and materials.
In addition, you can also wrap the handle of the knife with leather, which will add even more style and charm to your knife!
In conclusion, crafting a custom leather knife sheath is an achievable task that brings immense satisfaction. By following this guide and practicing patience and precision, you can create an adorable, personalized sheath that protects your knife and adds a touch of handcrafted elegance to your toolset.
Troubleshooting and Alternatives
No crafting process is without its potential issues, so here are a few common problems you might encounter while making your leather knife sheath and how to solve them.
Leather is too hard or brittle
Leather is a natural material and its condition can vary. If you find that your leather is too stiff, you can restore its pliability by applying some leather conditioner, which nourishes the leather and restores its flexibility. If it is brittle and cracks easily, the leather might be too old or has been improperly stored. In this case, it’s best to start over with a new piece.
Difficulty in stitching
If you’re finding it difficult to push the needle through the leather or the stitches look inconsistent, it could be because your leather is too thick. You can use a leather skiving tool to thin out the edges where the stitching will go, making it easier to work with. Also, make sure your needles and awl are sharp and the holes you’re creating for stitching are large enough.
Mold isn’t holding
If your leather sheath isn’t holding the shape of the knife well, it might be the leather wasn’t wet enough when you were molding it. Re-wet it slightly and let it dry while it’s wrapped around the knife, and it should hold the shape better.
As for alternatives, while vegetable-tanned and full-grain leather is the recommended materials, you can experiment with other types of leather. Top-grain or bonded leather can offer different finishes and may be more affordable options. Likewise, instead of a saddle stitch, you could try other types of stitching for a different aesthetic. A cross stitch, for example, could provide a unique look, though it might not be as sturdy.
Finale Words
Remember, patience is key in crafting. Don’t be discouraged if your first attempts don’t turn out perfect. Learn from the experience and continue to refine your technique. With each sheath you make, you’ll become more skilled and the process will become more intuitive. Before long, you’ll be crafting leather knife sheaths with confidence and precision. Happy crafting!
FAQ
Can I use synthetic leather for my knife sheath?
While it’s technically possible to use synthetic leather for your knife sheath, it’s not typically recommended. Synthetic leather, or faux leather, lacks the durability and resilience of natural leather. It can easily tear or puncture and often doesn’t age as well as genuine leather. If you’re aiming for a long-lasting, high-quality knife sheath, opt for natural leather.
Are there alternatives to saddle stitching?
Yes, if you find saddle stitching difficult, you can try alternatives such as the whip stitch or running stitch. These methods may not be as durable as the saddle stitch, but they can still effectively hold your sheath together. However, keep practicing your saddle stitch; it’s a highly valuable skill in leatherworking that gets easier with time.
What can I do if my knife is too tight in the sheath after wet molding?
If your sheath is too tight after wet molding, you can try remolding it. Dampen the leather again, insert the knife, and let it dry. You can also wrap your knife in a layer or two of plastic wrap before molding to create a bit more room.
What’s the best way to clean the tools after leatherwork?
Most tools used in leatherworking can be cleaned with warm soapy water. For cutting tools like utility knives or rotary cutters, wipe them clean after each use to maintain their sharpness. Tools such as awls or punches that get covered in adhesive can be cleaned with a solvent like rubbing alcohol.
I made a mistake while stitching. How can I correct it?
Mistakes happen, and the key is not to panic. If you’ve made a mistake while stitching, you can use a stitch ripper or a sharp knife to carefully cut and remove the problematic stitches. Then, rethread your needle and continue stitching from a point a few stitches before the mistake to ensure the seam’s strength. Remember to reseal any cut thread ends with wax or a lighter to prevent fraying.


